A great restaurant website doesn’t need much. But it should have everything a potential customer needs to know.
Anyone looking for a restaurant in Google is trying to find a few pieces of info:
At its core a restaurant website is very simple. But creating one can be complicated unless you have some technical background, or an awesome guide like the one you’re reading!
This guide is for all restaurateurs from BBQ joints to cafés and everything inbetween.
I’ll teach you how to setup your own restaurant website using WordPress so you can customize everything yourself. It’ll save you a lot of money and give you much more control over your site.
If you follow each step you should be able to get a site online in a day, possibly even under an hour.
This is a common question and a good one, especially considering other alternatives like Squarespace.
Right now WordPress powers 25% of the whole Internet so it’s a very stable choice. It has thousands of contributors around the world who build free themes, plugins, and offer support online for free.
WordPress is also a free platform so you can modify or download a copy of your site and keep it saved locally. With a WordPress website you have full control over everything.
In this guide I’ll show you how to setup WordPress on BlueHost which offers the simplest setup for a non-technical business owner.
With BlueHost you get a free domain name and free e-mail so you’re only paying for the hosting.
This is ultimately cheaper than Squarespace and it’s the perfect method for someone who just needs to get a quick restaurant website online and keep it there.
The setup process is pretty simple and it breaks down into a few steps:
None of this requires writing any code or dealing with nameservers or DNS settings or any of that gobbledygook. It’s a very straightforward and repeatable process if you have some patience to learn.
I’ll walk you through every step and by the end of this guide you should be confident enough to manage your restaurant’s website.
And if you ever run into trouble there are literally thousands of solutions in Google that can help you solve anything in WordPress.
But the first step is to pick a domain name so let’s start there.
Your restaurant’s domain is the URL address that visitors type to see your webpage. For example Unos pizza owns the domain unos.com.
You should stick with a .com suffix because it’s the most common. Many .com domains are already taken but a local restaurant can find a domain just by adding extra details like the state or country.
So for example let’s say you have a cafe named Dominos Cafe. Well the pizza chain already owns dominos.com, but you could try something like dominoscafe.com.
Sadly that’s taken too.
So instead you could then try something like dominoscafeny.com if your cafe is in New York.
It may be a tad long but it gets the job done.
And your visitors probably won’t type in the address anyways. Most people search in Google so the length of your domain doesn’t matter as long as it makes sense.
Once you have some ideas for your domain head over to BlueHost and click the “get started now” button.
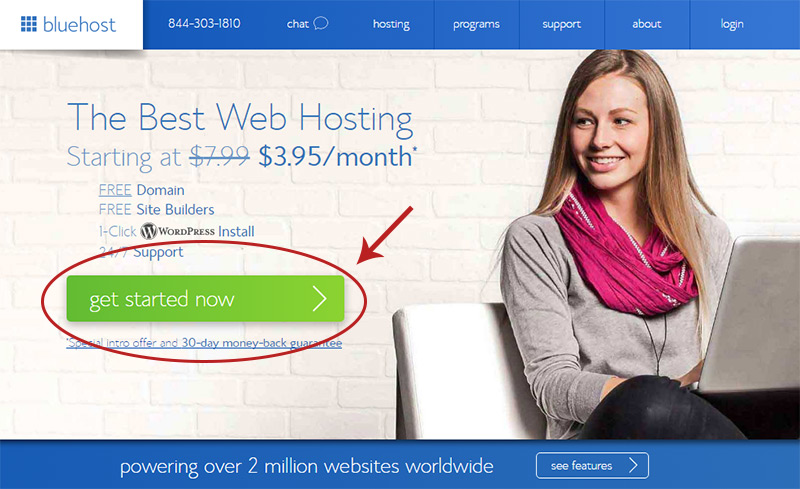
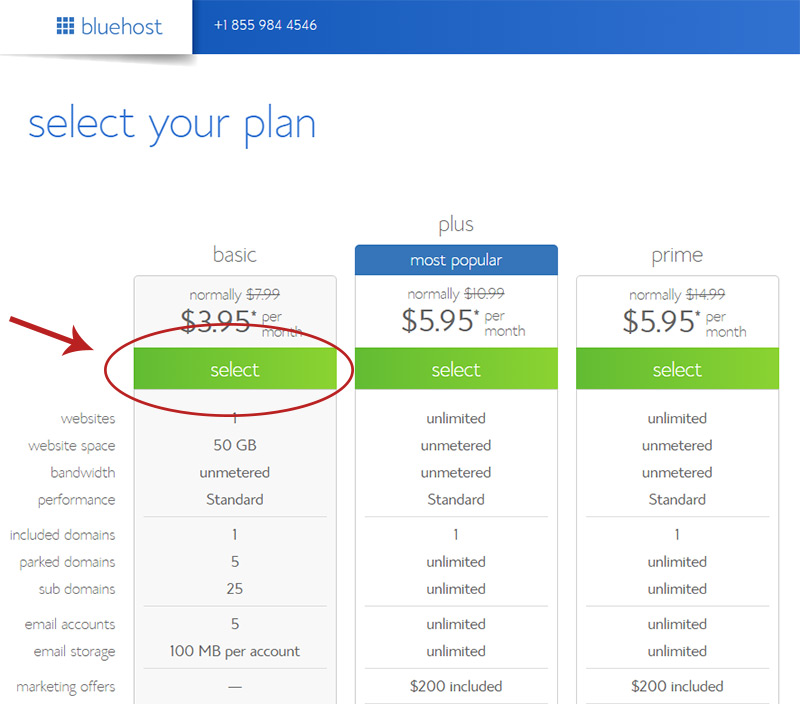
On the next page select the basic plan on the left.
This comes with a free domain, unlimited traffic, and 5 free e-mail addresses. This is perfect because you can make your own business e-mail like yourname@restaurant.com and host it alongside your website.
The next page asks you to enter your domain name. Make sure you enter it into the left box labeled “new domain”.

If the domain you want is already taken you’ll get a message with some alternative options. This is why it’s a good idea to have a small list of domains so you can make sure you get a good one.
Try to get a .com if you can. If you can’t get anything you could go with another suffix like .net or .org. But really exhaust all your options with a .com first.
Once you find an available domain move onto the final signup page.
Enter all your preferred contact details and then move down to the section labeled “package information”.
You’ll want to change a few things here before finishing. Namely you want to uncheck everything except the “domain privacy” section.
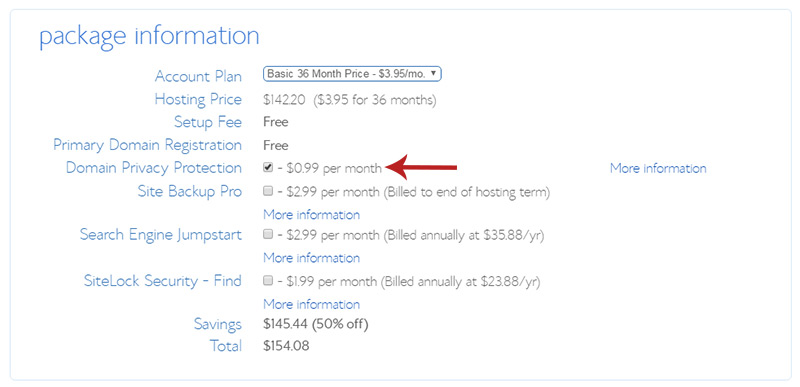
Domain privacy hides your personal info from a domain search and replaces it with BlueHost’s info.
This is a technical requirement based on the domain clearinghouse ICANN. They control all domain names and they require every domain to have some contact information.
But since few people want to have their contact details available it’s a good idea to keep domain privacy. But if you don’t care then you can certainly uncheck that box too.
One other thing you might want to change is the account plan range. It starts at 36 months so you’d be paying for 3 years upfront.
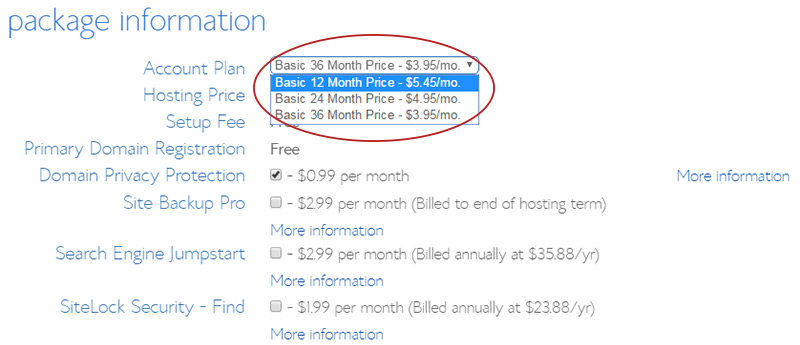
This does get you the cheapest monthly price but it also costs more upfront. If you know you’ll want your site online for 3 years then you can go that route.
If not then change the account plan to 12 months and save a bit upfront.
Once this is all set just enter your payment details and click submit.
It should all go through successfully and the next screen will ask you to create a password for your new BlueHost account.

Be sure to keep this somewhere safe in case you forget the password.
With your BlueHost account setup we can finally install WordPress.
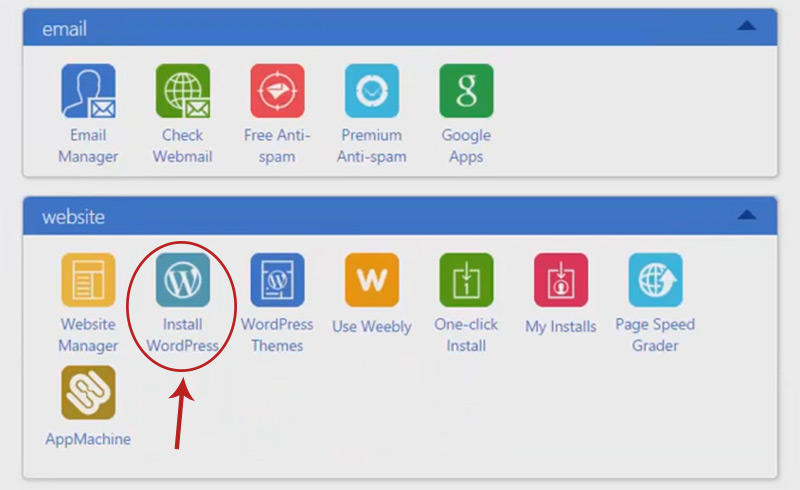
Your new BlueHost dashboard should have a series of boxes with blue borders. Inside you’ll notice a bunch of colorful icons.
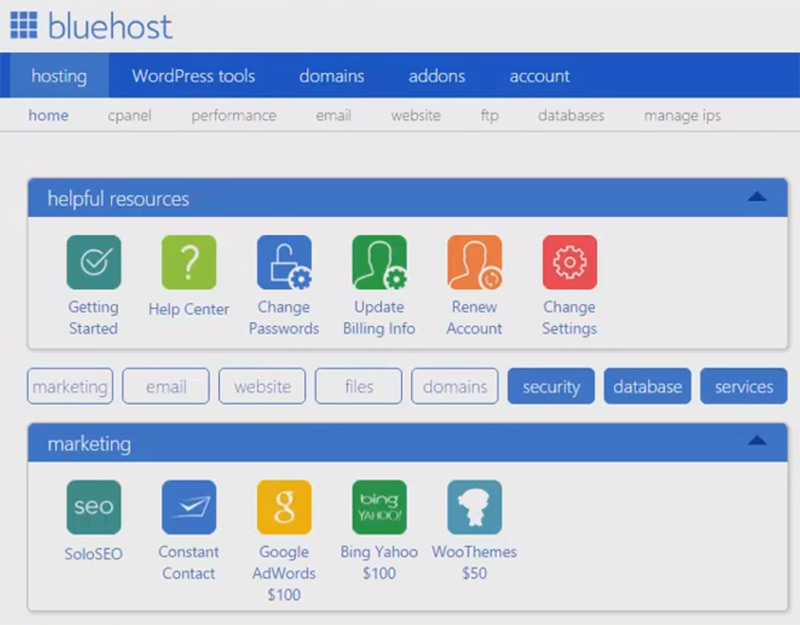
This is where you can create an e-mail account, check your e-mail, and more importantly install WordPress.
Scroll down to the fourth box labeled “website” and click the 2nd link. It should have a blue W icon labeled “install wordpress”.
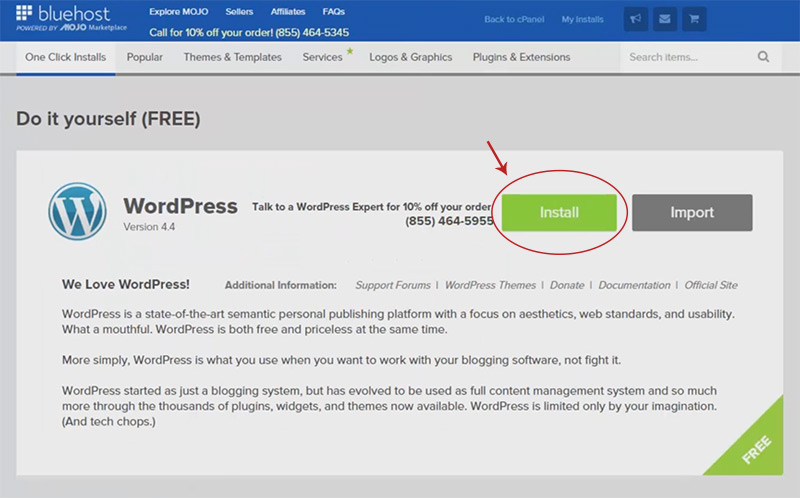
On the next screen you’ll find a bunch of upsells that you really don’t need.
BlueHost offers premium install services but you can do this all yourself for free. Just click the green “install” button to move onto the setup page.
First you’ll need to select the domain where you want to install WordPress.
If you just created a new account you should have your free domain available. But you can choose between a www or non-www prefix.
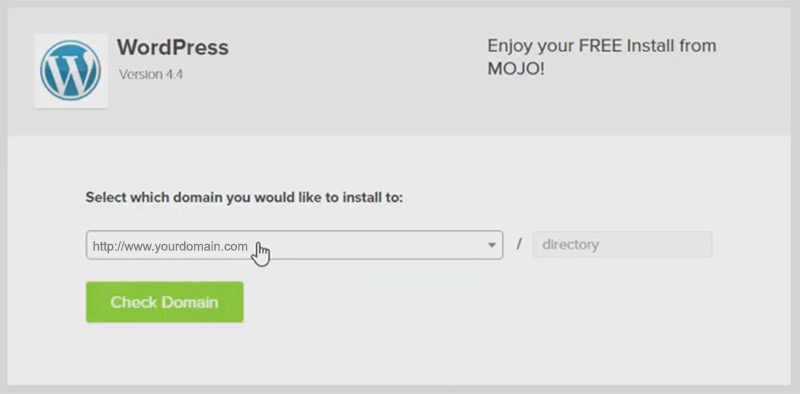
This choice really doesn’t matter other than how it looks in the browser. So pick whichever style you like best and click “check domain”.
This may take a few seconds to finish loading but once it’s complete you’ll be at the last step.
On the new page click “show advanced options” to expand a small box.
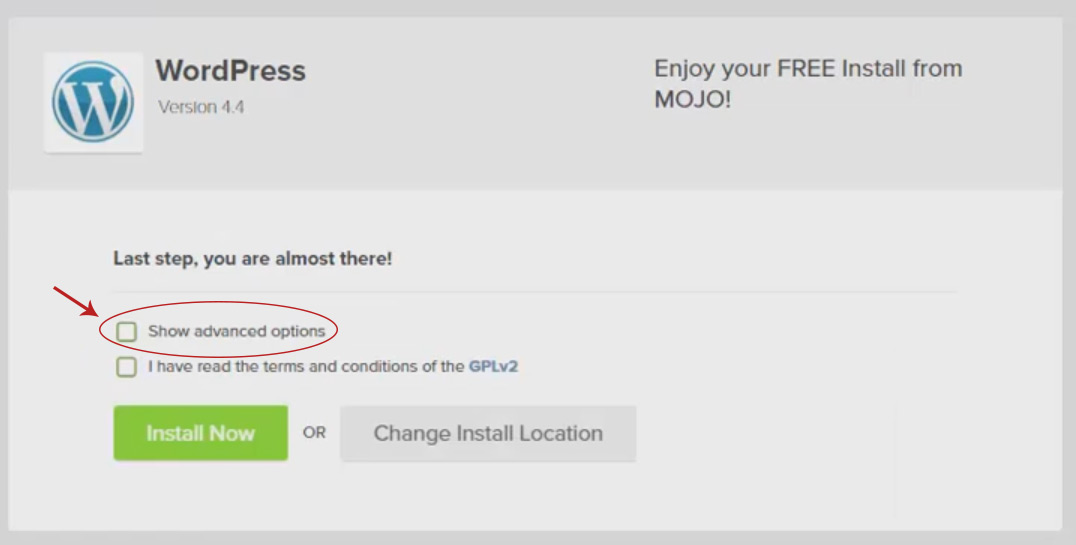
First you’ll need to enter your site name. This should be the name of your restaurant, and you can always change your site name later if needed.
The admin & password boxes are for your WordPress account info. This is how you’ll log into WordPress to setup and make changes to your website.
Pick a username and password that you’ll remember. These do not need to be the same as your BlueHost account. In fact you should probably do a different password as a security measure.
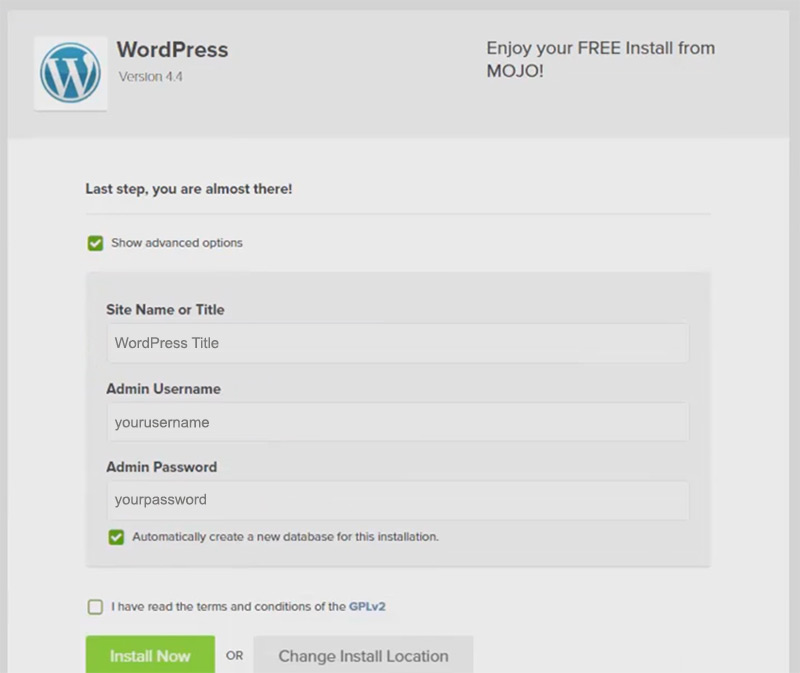
Once you’ve entered these fields check the terms & conditions box and click “install now”.
It’ll take a few minutes to install and you can track progress on the page. It’ll tell you once it’s done and then you can visit your new site at whatever domain you registered.
But since this is a fresh install it’s gonna look like a boring WordPress site. We can fix that.
To visit your WordPress admin panel just add /wp-admin/ to the end of your domain.
So if your restaurant’s website is mysite.com you should type mysite.com/wp-admin/ into the browser. This will bring you to a WordPress login page.
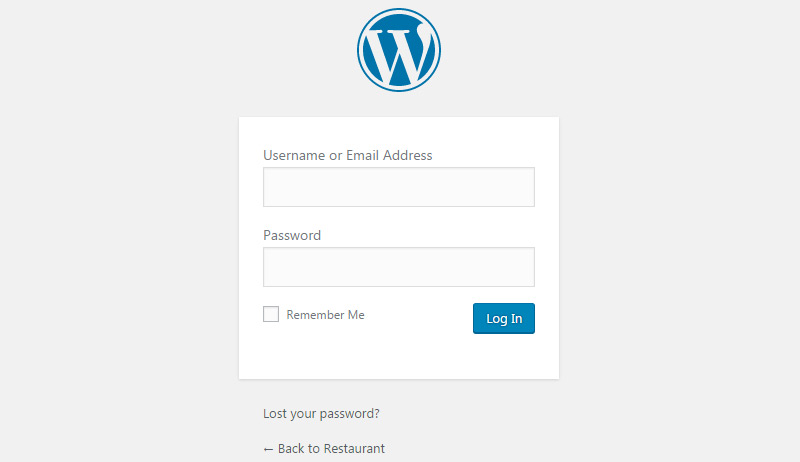
Enter the admin username & password you just created. You should now be in your brand new WordPress dashboard!
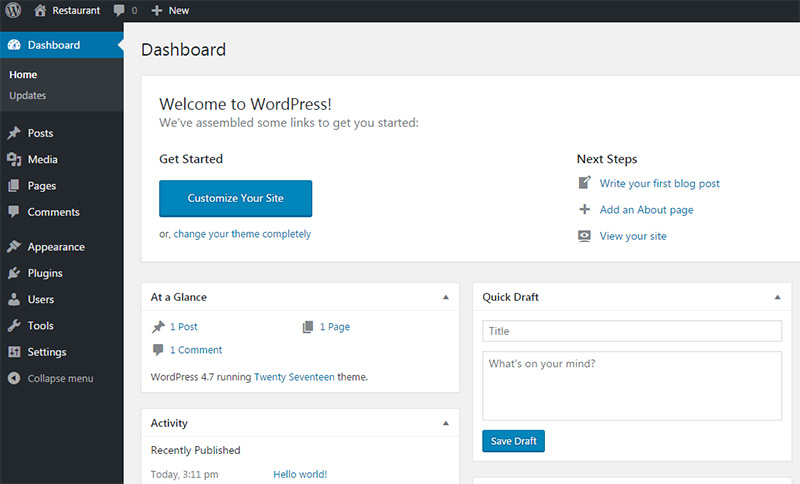
At this point you have a domain for your restaurant, a web host for the website and you’ve got WordPress installed. All the super technical stuff is basically done.
The rest of this guide will teach you how to customize WordPress into a bangin’ restaurant site.
Right out of the box you’ll get pretty much all the best features WordPress has to offer. But there are a few things you should change to better suit a restaurant website.
Find the “settings” link in the admin menu on the lefthand side. It contains all the major features and controls for your site.
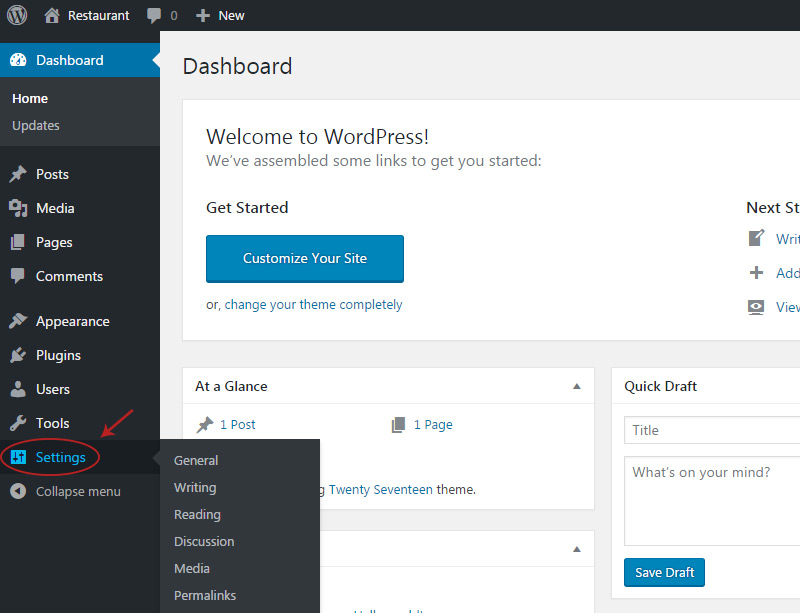
Click this link to get started on the general settings page. Here you can update your site’s name and tagline.
If your restaurant has a tagline you can enter it here. If not just delete the tagline and leave it blank. Then click “save changes” at the bottom of the page.

Move over to the settings menu and click the Discussion link.
This will bring up a new page covering all the features for user comments and pingbacks.
It’s a good idea to disable comments because they really serve no purpose on a restaurant site. To do this uncheck the box labeled “allow people to post comments” and hit save.

You could also uncheck the “send e-mail” settings and the “notify blogs” setting at the top. None of these really apply to a restaurant site so you don’t need to keep them on.
Lastly move back to the settings menu on the left side and click “Permalinks”.
This opens a new page with a few URL styles to choose.
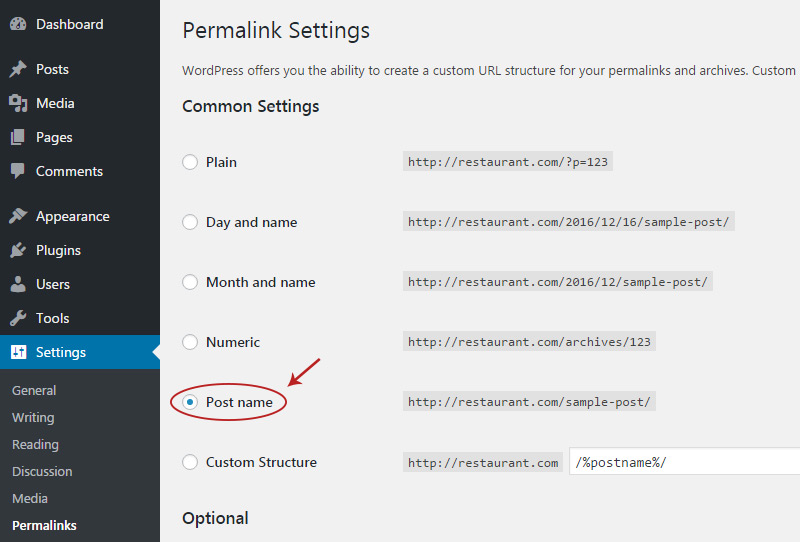
Click the “post name” style near the bottom and hit save.
This will make all your pages into short URLs which is the perfect structure for a restaurant site. Shorter URLs are easier to share and the text clarifies which page is being viewed.
One last thing to do is change your homepage to a static page.
WordPress by default acts like a blog so the homepage lists an archive of recent blog posts. And while restaurants can have their own blogs, they usually aren’t on the homepage.
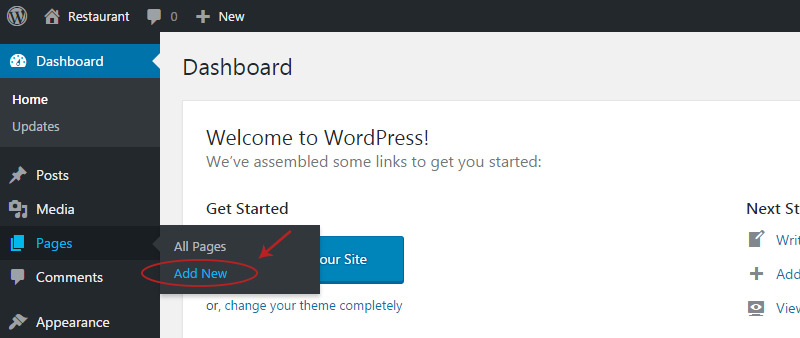
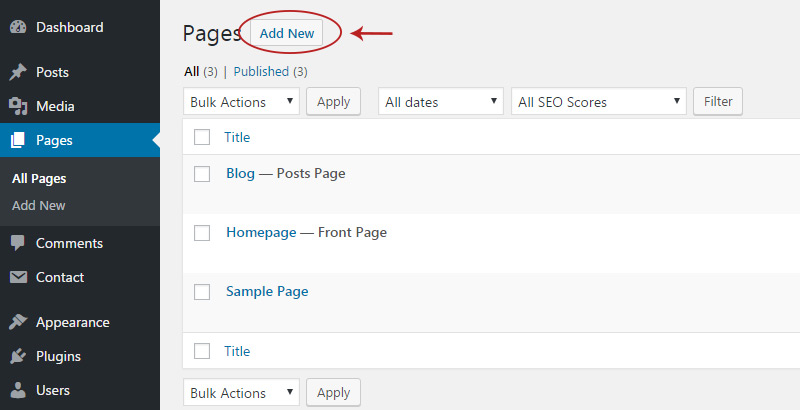
To fix this first go up to the pages link and hover for a flyout menu, then click “add new”.
Title this page Homepage and add some basic text into the body(could just say “text”). You just want to add some text so you know when you’re viewing the homepage.
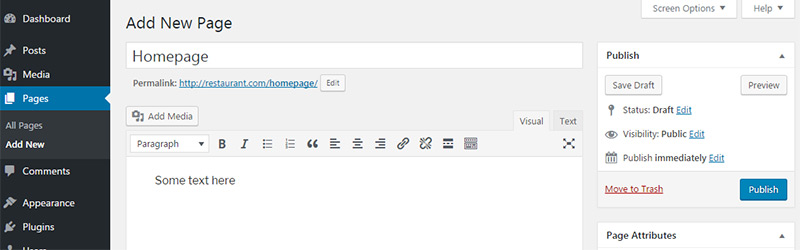
Now click publish. Look up towards the top of the page and you should see a link with the text “add new”.
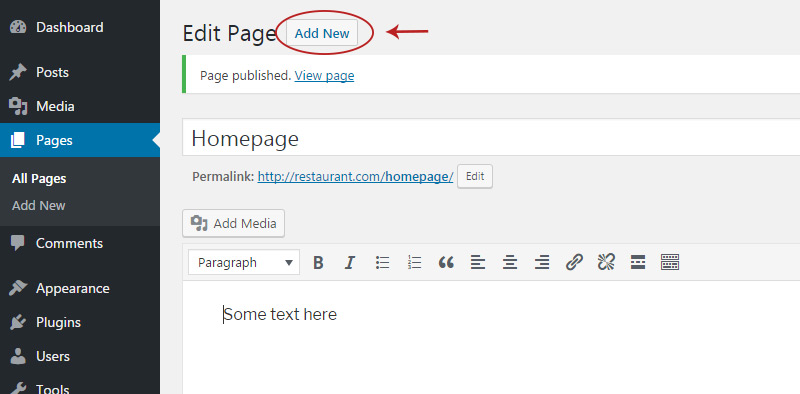
Click this to create another page. This time make the title “Blog” and you don’t need any content so you can leave the page blank. Hit publish to create this page too.
You should now have two pages, one named Homepage and the other named Blog.
Now hover the settings menu and in the flyout click “Reading”.
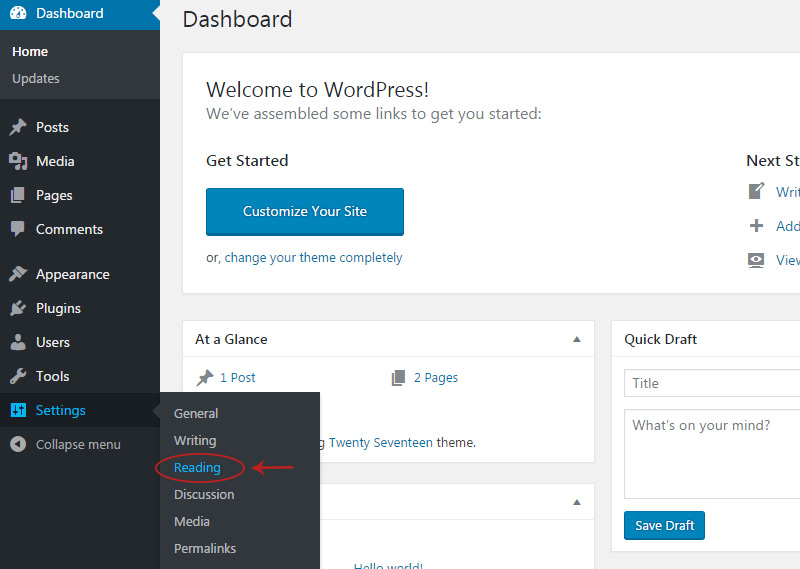
At the very top you’ll notice two buttons that define how your site’s homepage looks. The default shows your latest blog posts which is common for WordPress blogs.
But you want to click on the 2nd button to make it a static page.
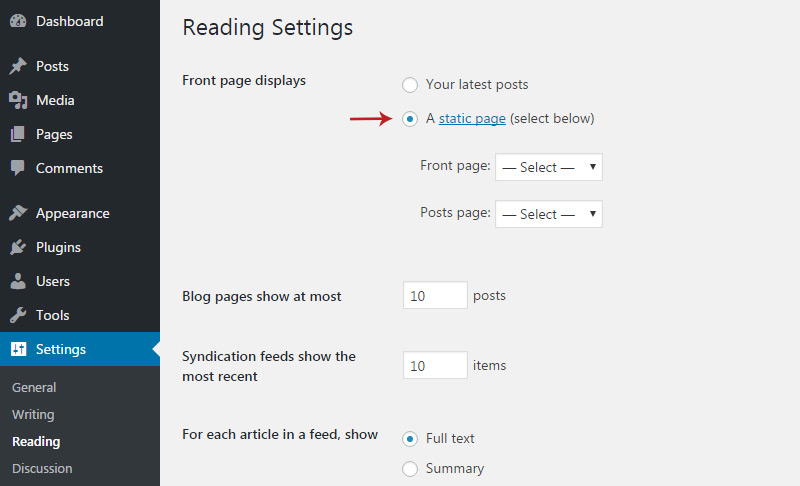
This activates two dropdown menus. You’ll need to choose which page displays on your homepage and which page will hold blog posts.
In the first dropdown pick the Homepage you just created. In the second dropdown select the Blog page.
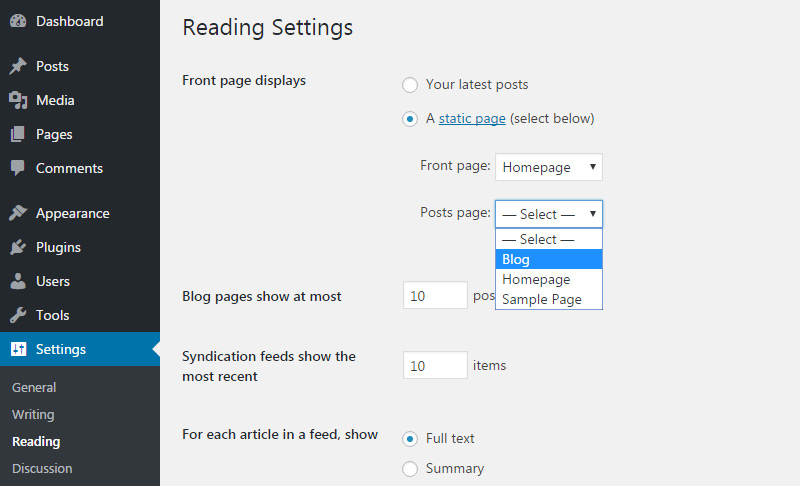
Now click “save changes” at the bottom and you’re all set.
At this point your site is updated a bit, yet you still have a very generic WordPress layout. We can change that with an awesome theme design.
A great design is the key to a functional restaurant website. Thankfully WordPress has thousands of restaurant themes both free and paid.
You can find tons of amazing free themes but the premium ones often come with more features. However you might feel like a premium theme has “too many” features for just a simple restaurant.
There’s no wrong choice here and you should look through the options yourself.
Check out the free restaurant themes in the WordPress directory to see what they have.
If you are curious to see some premium themes check out ThemeForest’s restaurant themes. ThemeForest is a marketplace where hundreds of web designers submit their themes for sale. You have a huge selection to choose from and most themes range from $30-$60.
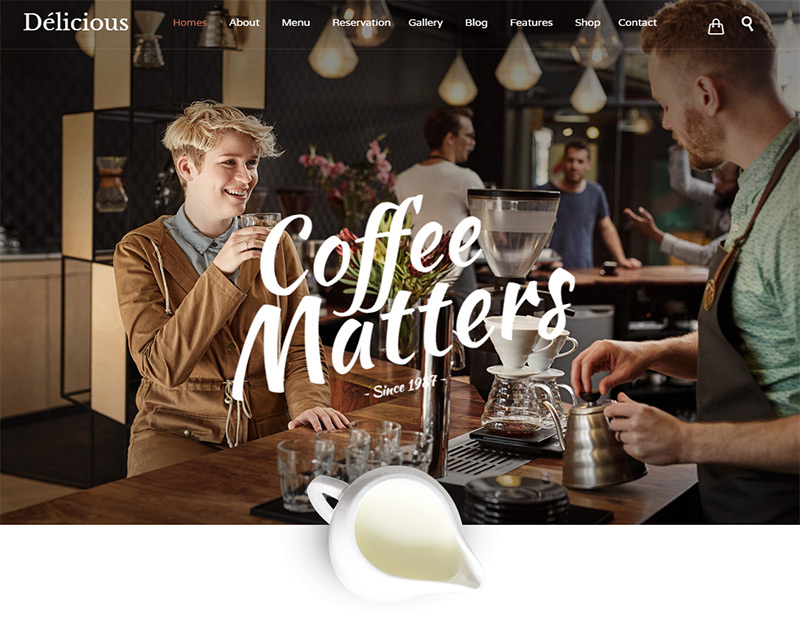
One common feature you’ll notice across all these themes is great photography. Restaurant websites sell a brand along with food.
Photos help sell both and with modern smartphones it’s easy to capture HD photos of your restaurant’s interior and the food you serve.
There are hundreds of themes you could pick but here are my personal favorites for both free & premium themes.
There’s a lot to look through so take your time picking a theme. You might even make a list of 3-5 favorites and whittle it down from there.
Keep in mind that all these themes are using demo content to present how they look. Your website doesn’t need to look exactly like these designs. You have free reign to customize the text, add/remove photos, and replace certain areas of each page.
For this guide I’ll use the free FoodHunt theme but I’ll show you how to install both free & premium themes.
In your WordPress admin panel click the Appearance link in the side menu.
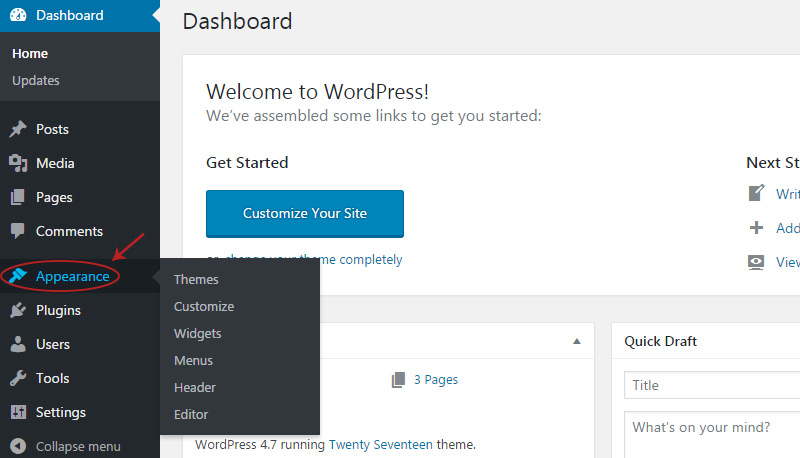
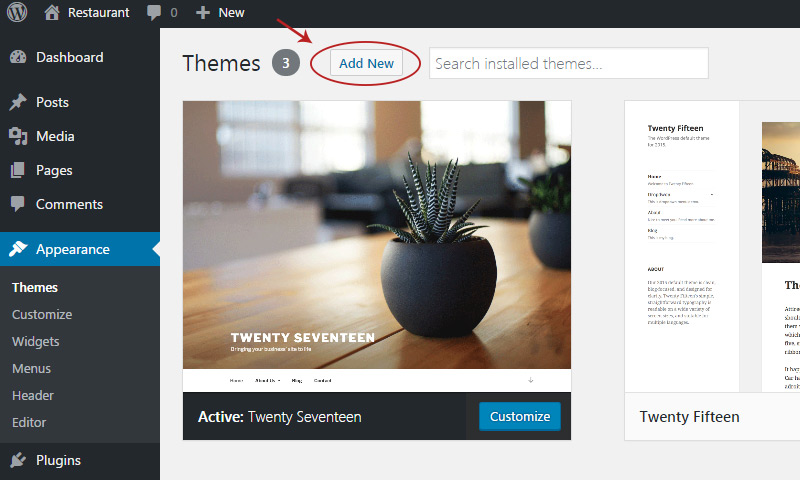
This is your themes list showing all the currently installed themes. Click the “add new” link at the top to install a new one.
In the top-right corner you’ll notice a search bar. This only works for free themes because it searches the WordPress database.
So I’ll type foodhunt and it’ll pop up in the search results. Hover the box and click the blue “install” button to install it.
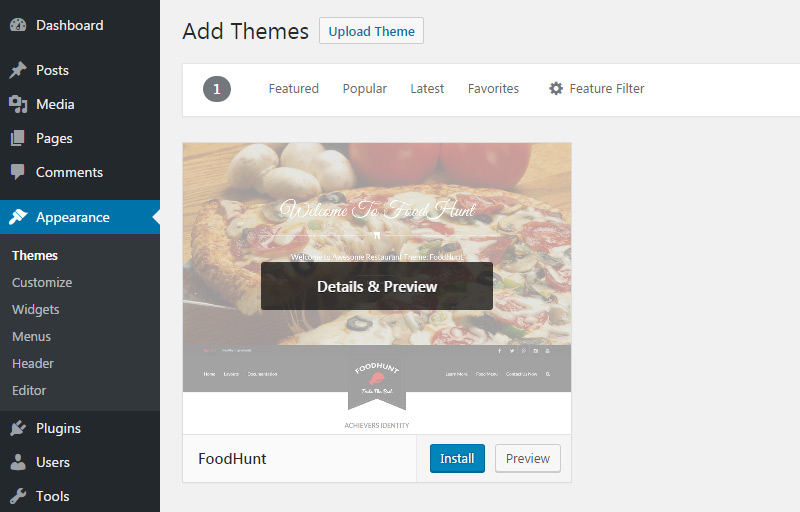
Wait a moment for the theme to download and it should automatically install without hassle. Now you can click “activate” to make this theme active on your website.
If you go with a premium theme you’ll follow a slightly different process.
Go to the Appearance -> Themes page and click the “add new” link at the top. But instead of searching for a theme click the “Upload Theme” link near the top of the page.
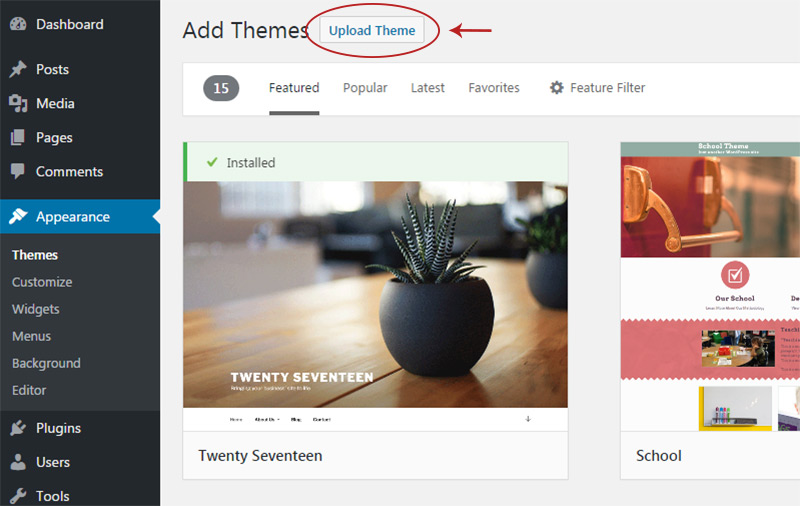
This displays a small upload form where you can upload a .zip theme. All ThemeForest themes come in .zip format so if you buy a premium theme you can upload it directly to your site.
Once installed you can click activate to make it your default. If you run into any trouble you can try un-zipping the theme and re-zipping the folder inside—but ThemeForest has strict standards so their themes come ready to upload.
Some free themes like Restaurante ask you to install extra plugins. This isn’t a bad thing because certain plugins help your theme run smoothly.
But most premium themes come pre-packaged with all the features you need so they’re easier to work with right out of the box.
So now you should have a restaurant theme, free or premium, installed and activated. Your site may not look pretty quite yet but it’s getting there.

Every theme comes with settings that let you customize the design. These are found under the Appearance menu—specifically the Widgets, Menus, and Customize links.
You might have a few other links if your theme comes with extra features. For example the FoodHunt theme has a “Background” link that lets me set the homepage background image.
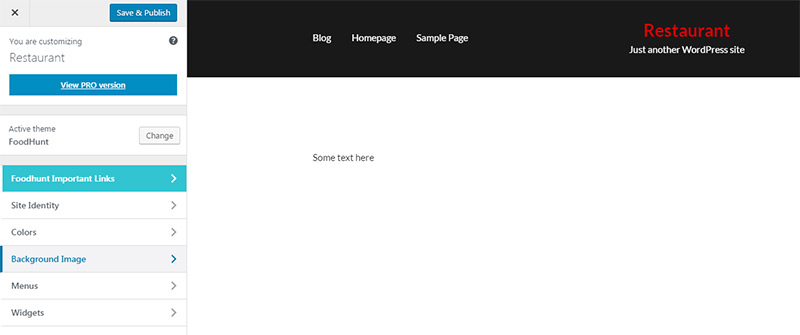
I’ll cover more about the widgets and menus a bit later in this guide. But the customize menu is something that’s different for each theme so you’ll have to tinker with that.
Don’t worry, you can’t break anything in the customize menu. It shows a preview of what your theme looks like as you make changes in real time. You can always cancel the changes so nothing’s permanent.
This is one of the best features of WordPress for non-technical users. You can tweak colors, padding, fonts, or whatever features the creator added to their theme.
If you’re ever confused by any of these menus just hit Google and do a search for some how-tos.
All the information you need is online for free so you can always learn how to fix something or change a design feature you don’t like.
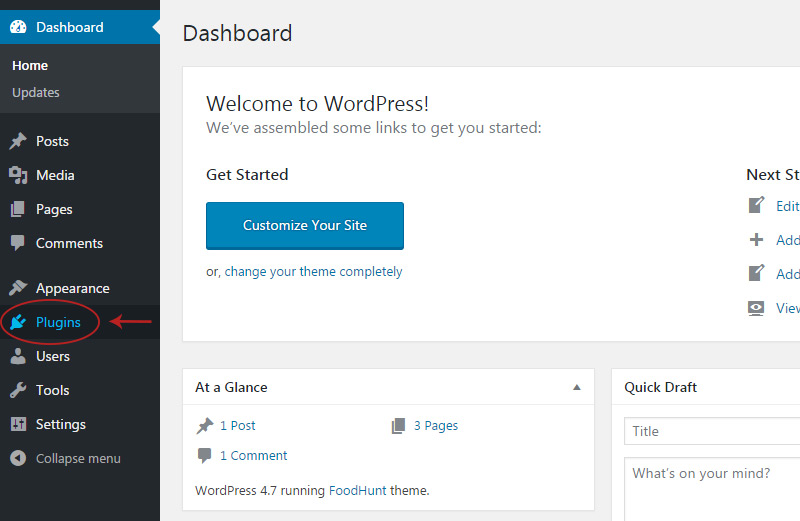
When you install WordPress it comes with a bunch of default plugins. None of these are needed for a restaurant website so I recommend deleting them all.
But there are a few handy plugins you should get and I’ll teach you how to install them.
First visit the plugins page by clicking the link in the admin menu.
On this page you’ll see a few plugins listed. When you hover one of the rows you’ll see a bright red “delete” link.
You can delete all the default plugins because you won’t need any of them. If you want to just deactivate them and leave them alone that’s fine too. But I hate clutter in my sites so I usually just delete whatever I don’t need.
To install a plugin you can follow the same procedure like with the themes.
On the plugins page you should see a link near the top labeled “add new”.
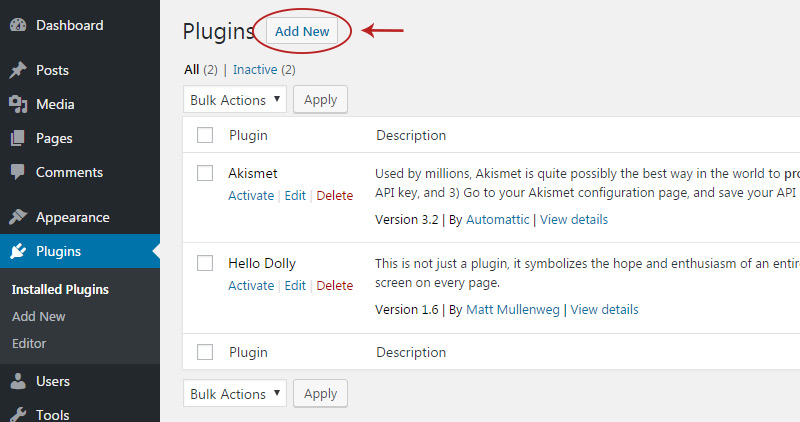
On this page you can search for any free plugin hosted by WordPress. You install them & activate them the same way.
Before we dive into plugins I want to clarify that these should be kept to an as-needed basis.
Plugins are great because they help you solve problems and offer custom functionality. But it’s easy to bloat up your WordPress site with too many plugins so make sure you’re running stuff that’ll actually help your site.
Let’s cover a few plugins that I think are requirements for any new restaurant website.
You don’t need to know anything about SEO or Google ranking techniques to run a website. But you should know that ranking your site is crucial to help people find you online.
Yoast SEO is a free plugin that performs all the messy SEO work for you.
It’s not a magic bullet and it won’t skyrocket your site to the top of Google. But it helps optimize all your pages that will help you rank in Google with enough time. Your site is much better running Yoast than not running it.
All you have to do is install & activate the plugin. It’ll take care of the rest.
I do suggest that you add your Yoast sitemap into Google webmasters because it’ll help Google find your site and get your pages ranking faster.
Once you activate Yoast SEO you can visit the sitemaps link.
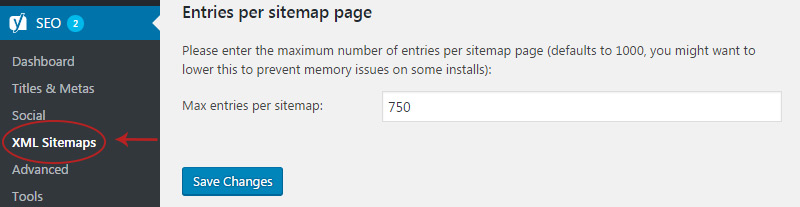
If Yoast hasn’t built a sitemap yet then you can build one and you’ll get a link to a sitemap file. You can sign up for a free Webmasters account with Google and submit this file. It’ll help your site rank quicker and it’ll prove that you’re the real owner.
However this is a bit technical so it’s completely optional at this point. Maybe save it for a rainy day. Here’s a guide from Yoast’s site to help you with that.
Web caching is another fairly technical subject that can be handled with a WordPress plugin.
WP Super Cache is a free caching plugin developed by the WordPress team. It automatically saves local copies of your pages & images so that your website loads faster.
All you have to do is install & activate the plugin. Every new page you publish will automatically be cached to speed up your website’s performance.
You don’t need to understand how caching works to benefit from it. Just know that caching will make your website faster so it’s generally a good idea to cache your site with a plugin.
Every business website should have a contact page. This can include the restaurant’s physical address and a phone number but it should also have an e-mail contact form.
Thankfully there are tons of free plugins you can use for this.
I recommend Contact Form 7 because it’s one of the most secure plugins and comes with all the features you could possibly need.
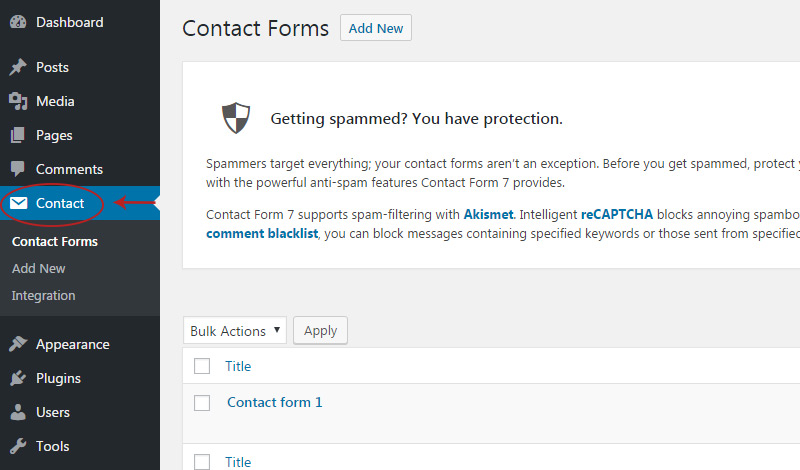
Once you activate the plugin you can make a contact form with your e-mail address as the recipient. You can change settings if needed but the default options are great.
When the form is done you can see it listed in the “contact forms” menu.
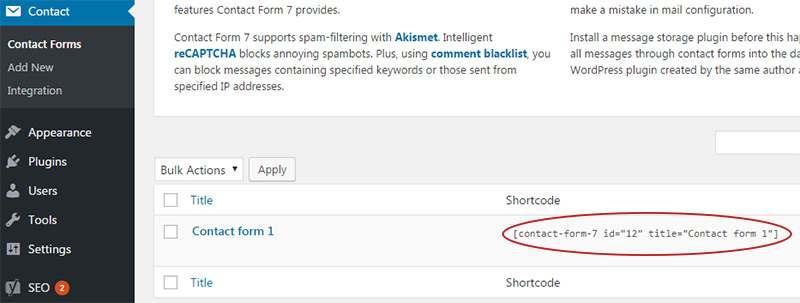
It’ll have a strange code placed between [brackets]. You just copy & paste this code into your contact page to add the form.
All contact form plugins require you to copy/paste some code so there’s no real way to make this simpler. But when you make a contact page you just copy the code once and you’re set.
Aside from the three plugins above there are some others you might like.
If you installed a restaurant-specific theme then you may not need any of these. But I want to at least mention them because they can be used to fill in functionality missing from your theme.
First is the Business Profile plugin which adds contact details, hours, and a Google Maps feature into your website.

Some themes don’t come with these features and you probably don’t want to design your own from scratch.
The plugin is totally free and it even supports multiple locations. Definitely an awesome choice if you need a quick way to add business details into your website.
Along with hours & contact info you’ll probably want to include a small menu somewhere on your site. This is easy with the Food and Drink Menu plugin.
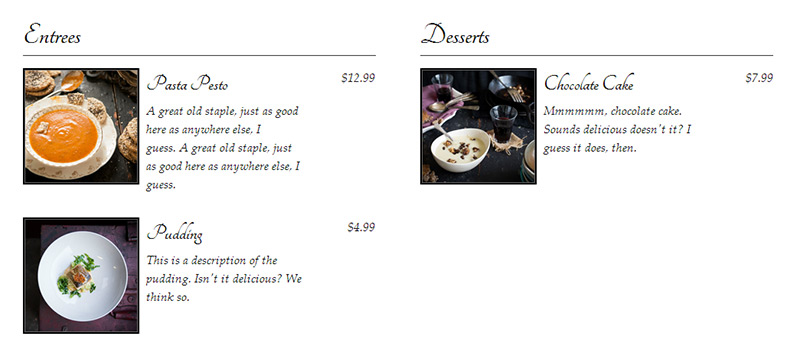
Some restaurant themes already have templates for adding a menu page. But if you need an alternate solution then this plugin is a great choice.
It lets you separate orders by style(vegan, pasta, etc) and by dish(dessert, entrée). You can upload a photo of each dish and include a price too.
The plugin has a lot of features and it has its own menu in the admin panel. It may take some time to learn how it works but if you tinker for a few hours you can figure it out.
Or you could skip this plugin entirely and just link to a PDF of your menu.
Take all of these plugins as recommendations and nothing more.
If you don’t like any of them you can always search for others and see what’s out there. No right or wrong answers here so pick whatever plugins work best for you.
Since you’re the owner of your restaurant’s website you’ll should maintain the site in working order.
And with WordPress this is super easy.
You’ll only have two real responsibilities when managing your site: updating WordPress and making changes to content.
The updates are the easiest to do any take basically 5 minutes. Whenever WordPress releases an update you’ll get a notification in your WP admin panel. The same goes for any plugins that need to be updated.
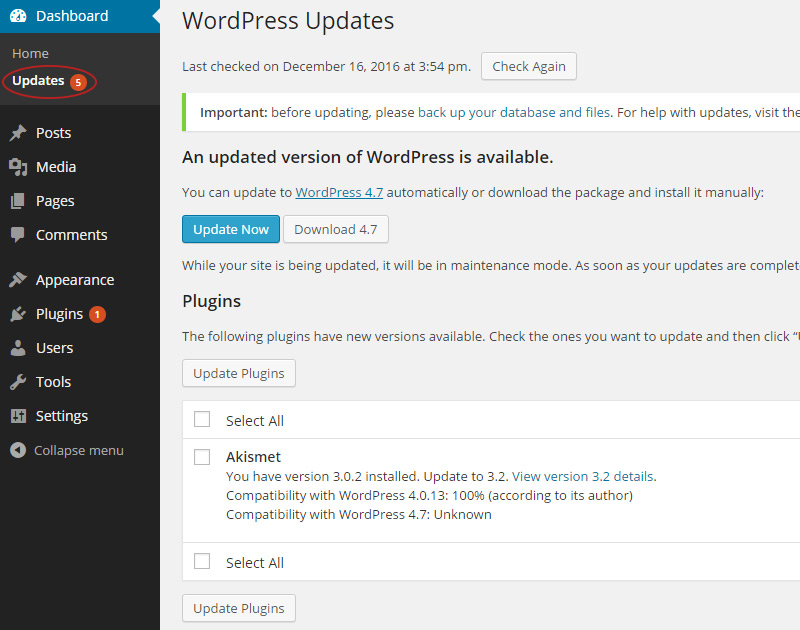
When updates are available you’ll see this little red icon next to the “updates” link. If you click it you’ll find a button that’ll auto-update everything.
The update process works by itself so you literally just need to click a few buttons. I’d recommend logging into your website once every couple months to make updates.
But if you forget it’s not a huge deal. You can make updates once or twice a year if you prefer. Just try to check on your site every so often to make sure it’s still working.
Actually maintaining your content is another task entirely. This is still pretty simple once you get the hang of it, but you’ll need to practice spending time in WordPress.
You can make pages whenever you want and these pages could have any info like menu items or about/contact info.
Earlier in this post I mentioned the widgets & menus links in the “Appearance” menu. I’d like to cover those briefly to show you how they work.
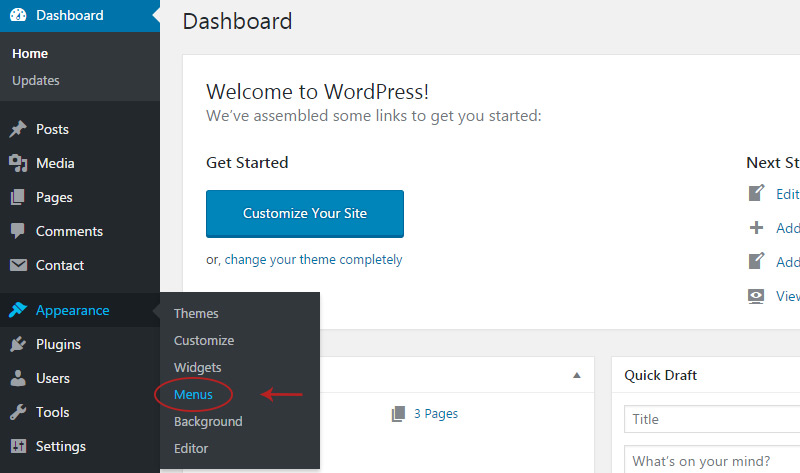
Hover the Appearance link in the sidebar and click the Menus link.
From here you can create a new menu by giving it any name you want.
This name doesn’t appear on your website so you could just call it “main menu” or something similar. The names help you make edits later because you might have other menus in your footer or sidebar.
Once you create a menu you’ll be able to pick which pages/links you want to add. You can click the checkbox next to any page to add it into the menu.
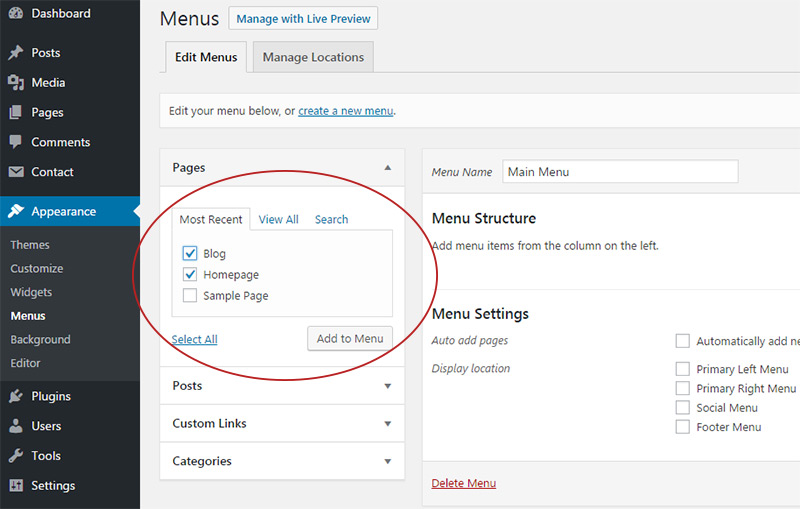
You could also add blog categories or even custom links if you have a URL(like a menu PDF).
Once items are added into the menu it’s easy to rearrange them with the drag and drop interface. You can also remove links as time goes on so this is a great feature to understand.
If you have all the links you want in the menu then scroll down to “menu settings” and click where you want the menu placed in your theme.
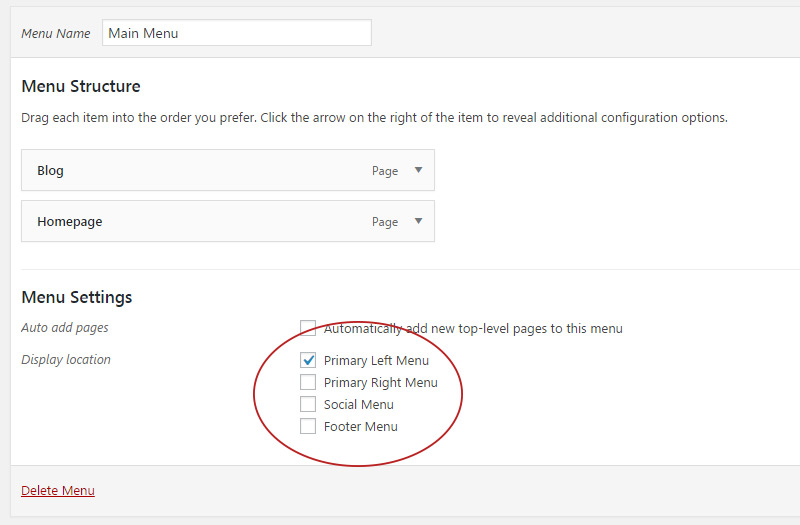
Each theme has different menu locations so if you change themes you might need to adjust menus. But it’s all very simple and you can learn to create/update menus in under an hour if you tinker with it.
I also want to cover the widgets menu found under the Appearance link.
Every theme comes with different widget areas so you may never need to touch this menu.
Most of the time it’s used for sidebar widgets that you can drag/drop into your site. But more complex themes have widget areas on the homepage or footer where you can drag & drop whatever you want.
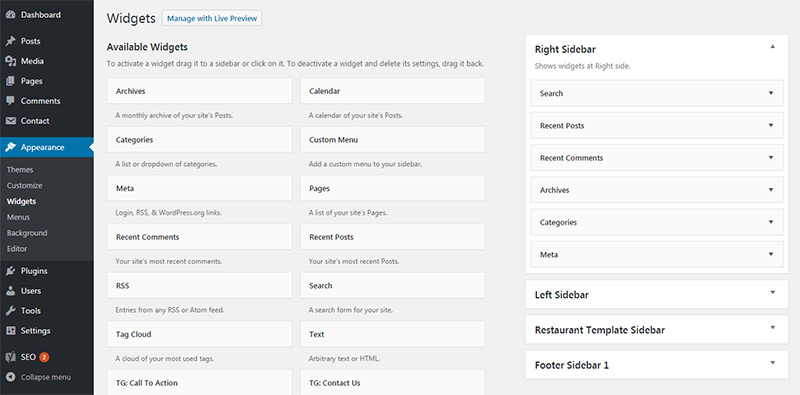
This is something you cannot screw up. Every widget can be moved, removed, and added back again whenever you want. Your site displays widgets automatically so if you move a widget it’ll auto-save and you can view it on your homepage right away.
Spend a bit of time under the Appearance menu to see what else you can customize. There are a lot of options but you probably won’t use them all.
Once your theme looks good you basically never need to touch it again. This is the perfect set it and forget it solution that any busy restaurant owner wants.
And with that said I think it’s time to wrap up.
It’s invigorating to know that you don’t need a web designer or agency to launch a site by yourself. I hope this guide is easy to follow and can help at least one person setup their own restaurant website.
Granted there’s always a learning curve but WordPress offers the simplest place to start. And the more you use WordPress the easier it’ll get.
If you have any critiques or suggestions for this guide please reach out and share your thoughts.
If you feel any part of this guide is lacking in depth, or too complicated, I’m happy to make updates and polish this guide into the best resource for restaurant owners worldwide.
Best of luck with your new site!
Jaime is a jr. designer interested in mobile UI/UX research and frontend web development with JavaScript frameworks. He covers general news and useful resources in the web design space.